How to View Our Show in 3D
Welcome! We want everyone to experience the depth of our imagery, whether you have a high-end VR headset or just a pair of cardboard glasses. Here are your three options for joining the 3D experience.
1. The Main Zoom Window
Best for: Instant viewing without extra setup.
Watch the live stream directly. We screen-share images in Anaglyph (Red/Cyan).
- Requirements: Standard Red/Cyan 3D glasses.
- Pros: Simply put on your glasses and follow the host.
2. The Stereopix “Room” (Synced & VR Ready)
Best for: VR Headsets (Quest), 3D Monitors, and 3D TVs.
This is a live, synchronized gallery. When our staff advances the slide, your screen updates automatically.
- URL: https://rooms.stereopix.net/nysa (Note: This link is only active while the show is live).
- For VR Users: Open this link in your headset’s browser (e.g., Quest Browser). Once loaded, click the “Enter VR” or Goggles Icon at the bottom to enter a fully immersive environment.
- Custom Viewing: Click on the image to bring up the controls to choose your preferred output:
- Anaglyph: Choose from various color modes (Dubois, Gray, etc.).
- Side-by-Side: For Parallel or Cross-eyed free-viewing.
- 3D Hardware: Support for Interlaced 3D Monitors or 3D TVs.
3. The HTML Gallery (Manual & Mirror Method)
Best for: Browsing at your own pace and the “Mirror Method.”
This gallery is created via StereoPhoto Maker. It does not advance automatically, making it perfect for studying details or using specialized optics.
The Mirror Method
If you don’t have 3D glasses, you can use a small, handheld mirror.
- In the gallery settings, change the display mode specifically to “Mirror” (usually listed as Mirrored Left).
- Hold a small mirror vertically against your face, resting it against your nose.
- Angle the mirror so one eye looks directly at the screen, while the eye behind the mirror sees the reflected half of the image.
- Adjust until the two views fuse into a sharp 3D image.
Feature Comparison
| Feature | Zoom Window | Stereopix Room | HTML Gallery |
| Advancing Slides | Host Controlled | Automatic | Manual |
| VR Headsets | No | Yes (Immersive) | Yes (Browser) |
| 3D Monitors/TV | No | Yes | Yes |
| Special Modes | Red/Cyan only | Anaglyph, SBS | Mirror Mode, SBS |
| Free-viewing | No | Yes | Yes |
Here is the guide on how to freeview stereoscopic photos, complete with illustrations for each method.
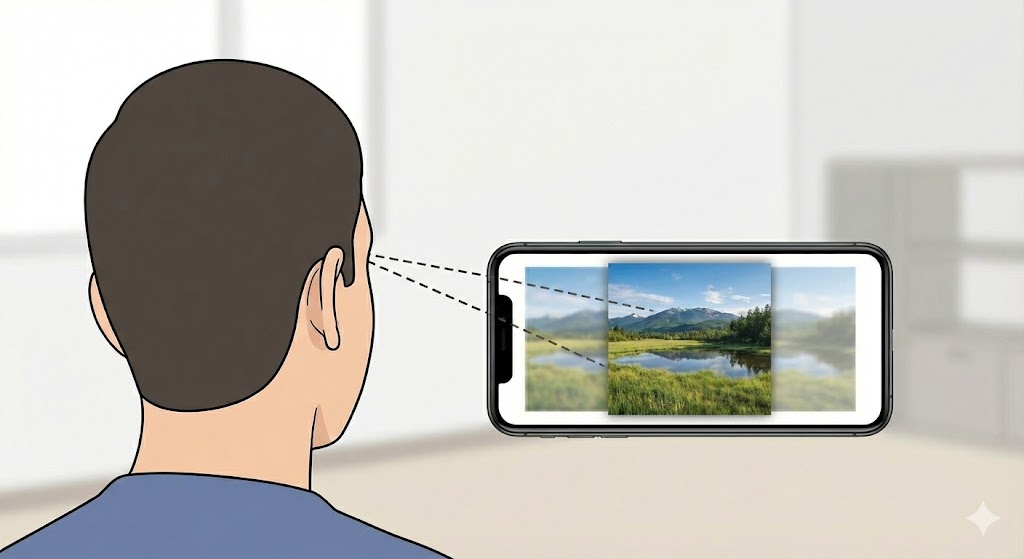
Method 1: Parallel Viewing
This method involves relaxing your eyes to look “through” the screen, as if focusing on a distant object. It’s best for smaller images on phones or stereo cards.
The Technique:
- Level your gaze: Hold your screen level with your eyes.
- Look “through” the screen: Relax your eyes as if looking at a distant horizon. The two images will blur and overlap, creating three blurry images.

- Lock in: Focus your attention on the center image of the three. As it snaps into focus, you will see it in full 3D depth.
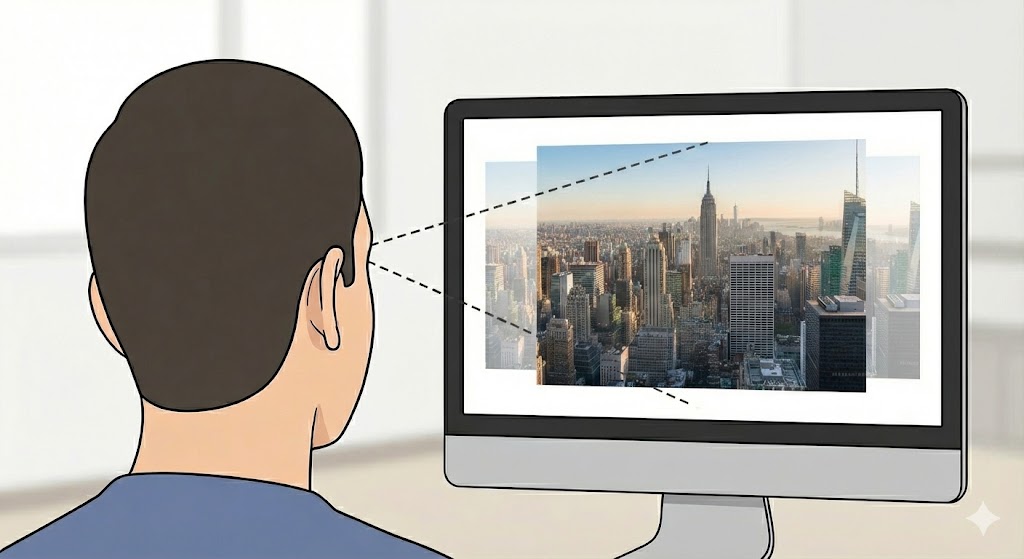
Method 2: Cross-Eyed Viewing
This method is often easier for larger images on computer monitors. You cross your eyes to overlap the two images.
The Technique:
- Center yourself: Sit directly in front of the screen.
- Slowly cross your eyes: Begin to cross your eyes until you see the two images double and overlap.
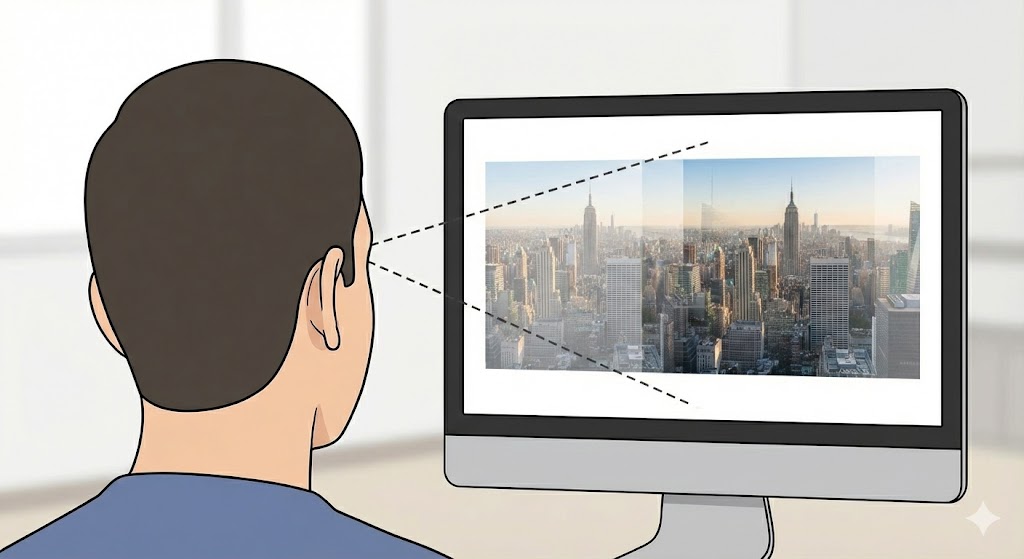
- Aim for the middle: Overlap the two images until they form a single, central image. Once your brain adjusts, the 3D effect will “pop.”